The Lasso tool (L) is used for making selections of objects, especially those with straight or high contrast edges. It is one of the most useful tools that Photoshop offers. It comes in three varieties - the Freehand Lasso Tool (or simply the 'Lasso Tool'), the Polygonal Lasso Tool and the Magnetic Lasso Tool. Here we discuss all three types. To choose the Lasso Tool, click on it in the tool bar as shown below. Then click on the type you want. Alternatively, you may simply press L to select it and press Shift + L to change the type.
The Freehand Lasso Tool (Lasso Tool):
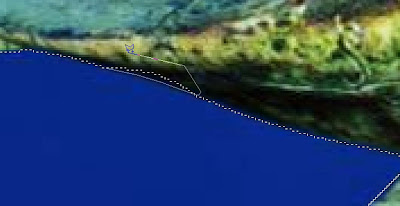
The tool is shaped like the lasso of a cowboy. This is probably the easiest to understand because you simply drag a freehand selection around the object or area you want to select. After choosing the tool, simply click on the edge of the object you want to select and outline it with the left mouse button held down. If you want to scroll, hold down the Space bar and Photoshop temporarily switches to the hand tool. To zoom, press Ctrl + at any time. You can complete the selection by letting go of the mouse at the point where you started. In case you let go at a prior point, then Photoshop will automatically complete the selection by joining the end and start points by a straight line. Here I've started selecting part of a turtle. As you can see, the selection is nowhere near perfection. But don't worry, we'll discuss how to correct a selection a little later, below.
The Polygonal Lasso Tool:
This is the lasso tool shaped like a polygon. It can be used to make selections in the form of a polygon like a house or a building. For more complex objects like this turtle, you can make your selection by creating a polygon whose sides are very small. That way, you will get a continuous curve.
Here is how you use it. After choosing the tool, click on the point where you want to begin your selection. I have started at the top of the turtle's tail. Zoom in (Ctrl +) and click on the next point on the object such that the first point and this are almost a straight line. Like this, outline the entire object. In case you want to switch over to the Freehand Lasso Tool in the middle, you can temporarily do so be holding down the alt key. Scrolling can be accomplished by holding down the Space bar. You can complete the selection by clicking on the point you started at. If you double click, Photoshop will automatically close the selection by joining the start and endpoints with a straight line.
The Magnetic Lasso Tool:
This is the third type of lasso tool and one of the most exiting features of Photoshop! With just a couple of clicks and a lazy drag, you can produce a selection of high accuracy (70-90% depending on the figure). Here's how. First choose the Magnetic Lasso Tool from the tool bar. The icon is similar to the polygonal lasso tool but has a tiny magnet on its head. Once you've done this, to begin selection, zoom in (Ctrl + ) and click on the edge of the object you wish to select. Release the mouse button. Now, slowly move the tool along the edge of the object. You will notice that the tool will add anchor points on the edge as you move the mouse along.
What the tool does, is that it checks the contrast levels between areas near the mouse and adds an anchor point wherever it feels there is a sufficient difference in contrast. It basically finds the object's edge. You can change the minimum contrast difference in the bar (which appears on top) as shown below. Also the area in which the tool looks for an edge can be set by changing the width or by pressing '[' or ']'. To view the ara of consideration, press Caps lock. The frequency controls the rate at which anchor points are added. 57 is the standard value and it works well.
So as you move the mouse, more anchor points are added. You can add them manually as well by clicking wherever desired. Also, you can remove previous anchor points by simply pressing the Backspace button. To complete the selection, click back on the starting point.
Selection correction:
This is absolutely necessary to improve the accuracy of your selection.
Once you've made your selection using one of the lasso tools, zoom in and examine the around the edges of the object. Select one of the lasso tools, whichever suits you and the situation, and scroll to the place where there is a discrepancy.
In case the selection goes outside the object like above, then hold down the Alt key. You will notice that a '-' appears next to the tool icon. Select the part of the selection to be removed as shown, without letting go of the Alt key.
Once the you've done that, the original selection will be modified as per your new selection.
Similarly, to increase the area of selection, hold down the Shift key and select a new region to be added to the current selection.
Once you've done this to the whole object, you will get a perfect selection.
To copy the selection, choose the layer of the image from the layer window (F7) and press Ctrl + C. Paste it wherever you want by pressing Ctrl + V.
 |
| The turtle, with no background! |
And it's as simple as that!


No comments:
Post a Comment