
It is often thought that there is a LOT to learn in Photoshop before one can become a good photo editor. But the truth is, there are only a handful of things you need to know before you can accomplish almost anything. Layer Blend modes comprise one such thing. It is essential to know when and how to use them. Here is a black and white image whose colouring is done using Layer Blend modes. A Layer Blend mode basically determines how a layer interacts with layers below it.
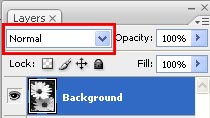 The option to choose your Layer Blend mode is found at the top of the Layer window (F7).The default mode is 'Normal'. There are several types of such blend modes. They can be broadly classified as shown below.
Now, we will discuss 4 important layer modes
1. Multiply ( Alt + Shift + M)
It is a Darken blending mode. Imagine a light beam passing through two identical slides and then landing in a wall to form an image. The image thus formed, will be darker than the image that would be formed with only one slide. This is essentially what the Multiply Blending mode does. Here is an example of what this blending mode can do.

Duplicate the image twice by hitting Ctrl + J +J and then change the Blending Mode of the new layers to Multiply. Go to the top most layer. Next go to Filter > Blur > Gaussian Blur and enter a radius of 5. You should get something like this.

2. Screen ( Alt + Shift + S)
The Screen mode brightens the image by lightning the lower layer based on the lightness of the upper layer. The result is always lighter, and makes it a good mode for correcting exposure in photos that are too dark. Here is an example. Consider this image.

Duplicate the image layer by pressing Ctrl + J and chagne the blending mode of the new layer to Screen. You can adjust the brightness of the screening layer if required.

Duplicate the image layer by pressing Ctrl + J and chagne the blending mode of the new layer to Screen. You can adjust the brightness of the screening layer if required.

3. Overlay ( Alt + Shift + O )
The Overlay Blending mode is used to improve the contrast of an image elegantly. The mode preserves the highlights and shadows of the base color while mixing the base color and the blend color (top layer). It is a combination of the Multiply and Screen blending modes: multiplying the dark areas, and screening the light ones. Here is an example. Consider this image.

Duplicate the image twice by hitting Ctrl + J +J and then change the Blending Mode of the new layers to Overlay. You should get something like this.

4. Color ( Alt + Shift + C )
When the Color mode is applied, only the colour from the top layer is blended in with the layers below it. The Shadows and highlights of the original image are retained. Similar principles are used to colour old black and white movies. The Color blend mode is perfect for when you want to add or change the colors in an image without changing the brightness values. Here is an example with a desaturated sunflower image.

Create a new layer on top of your image and set it Blending mode to Color. Choose a suitable colour and paint over the petals (with the new layer selected) with the Paint Brush tool.

Duplicate the new layer by hitting Ctrl + J.

You will get something like this.
Feel free to comment or post any queries or images.
If you like this tutorial, you should check out some of our other ones
No comments:
Post a Comment